This page shows how to import data from SQL Server into Hadoop via Apache Sqoop.
Prerequisites
Please follow the link below to install Sqoop in your machine if you don’t have one environment ready.
Sqoop CLI
Available commands
Use the following command in Command Prompt, you will be able to find out all the available commands.
%SQOOP_HOME%\bin\sqoop.cmd help
In v1.4.7, the following commands are available.
Available commands: codegen Generate code to interact with database records create-hive-table Import a table definition into Hive eval Evaluate a SQL statement and display the results export Export an HDFS directory to a database table help List available commands import Import a table from a database to HDFS import-all-tables Import tables from a database to HDFS import-mainframe Import datasets from a mainframe server to HDFS job Work with saved jobs list-databases List available databases on a server list-tables List available tables in a database merge Merge results of incremental imports metastore Run a standalone Sqoop metastore version Display version information
See 'sqoop help COMMAND' for information on a specific command.
In this example, I am going to use command import.
Sqoop import command
The details of this command are available in the following documentation.
http://sqoop.apache.org/docs/1.4.7/SqoopUserGuide.html#_literal_sqoop_import_literal
Create the script file
Purpose
For this tutorial, I am going to create a cmd script file to call this command to import data from the following SQL Server:
- Server: localhost
- Database: Mecury_Db
- Login: zeppelin
- password: zeppelin
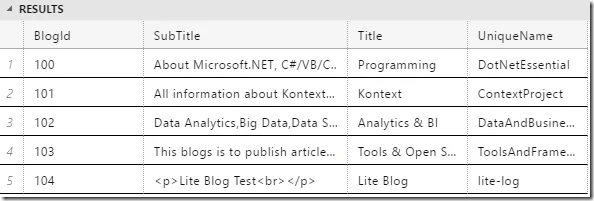
- Select command:
SELECT [BlogId]
, [SubTitle]
, [Title]
, [UniqueName]
FROM [Mercury_Db].[context].[Blogs]
The above query should return the following result:
Script file
Create a script file sqoop-test.cmd with the following content:
%SQOOP_HOME%\bin\sqoop.cmd import --connect "jdbc:sqlserver://localhost;databaseName=Mercury_Db" ^ --username zeppelin ^ --password zeppelin ^ --query "SELECT [BlogId], [SubTitle], [Title], [UniqueName] FROM [context].[Blogs] WHERE $CONDITIONS" ^ --split-by BlogId ^ --columns "BlogId,SubTitle,Title,UniqueName" ^ --num-mappers 2 ^ --map-column-java "BlogId=Integer,SubTitle=String,Title=String,UniqueName=String" ^ --target-dir "sqoop_test/blogs" ^ --delete-target-dir ^ --as-parquetfile
In the above script, Sqoop will use user name zeppelin and password zeppelin to connect the localhost server with default database set as Mercury_Db.
The command use query instead of table parameter. The driver will initiate two mappers to extract data which is split by column BlogId.
The data will be kept in sqoop_test/blogs folder of the running user (proxy user). The file format is parquet. If the folder exists in HDFS already, it will be deleted first.
Run the script file
Before you run the script file, make sure Hadoop dfs and yarn daemons are started.
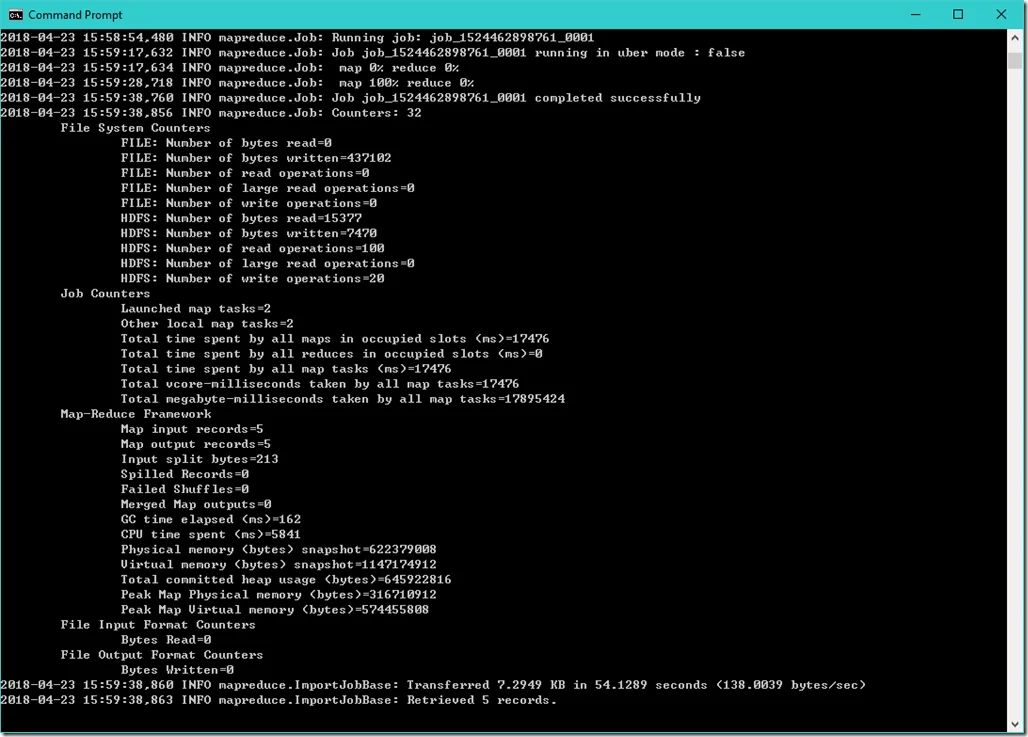
The following is a running result screen for this job:
You can also track the job status in YRAN:
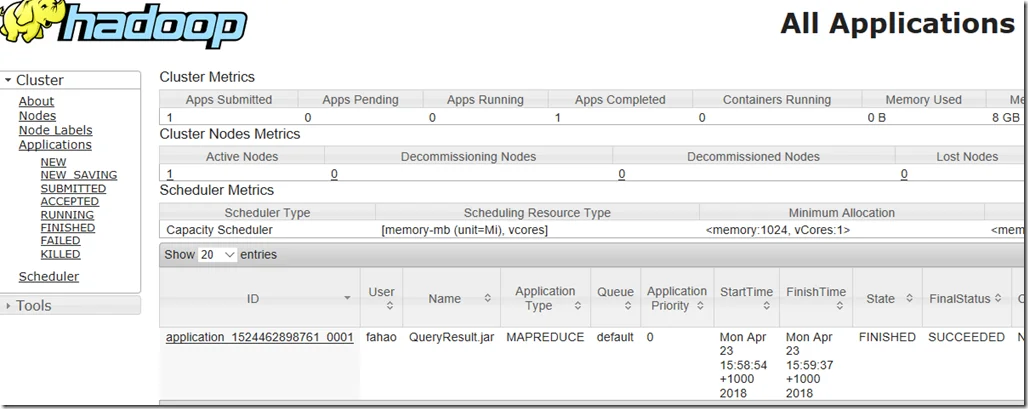
As you can see, it is a Map Reduce application.
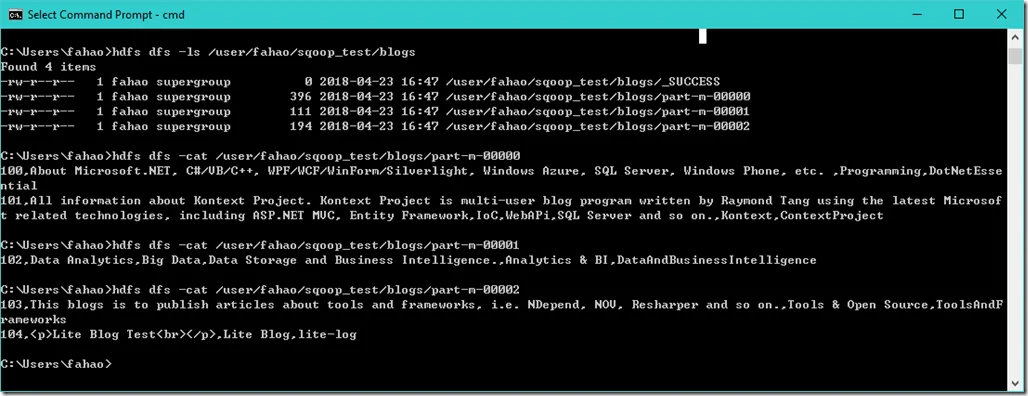
Verify result
We can verify the result through name node web UI or CLI.
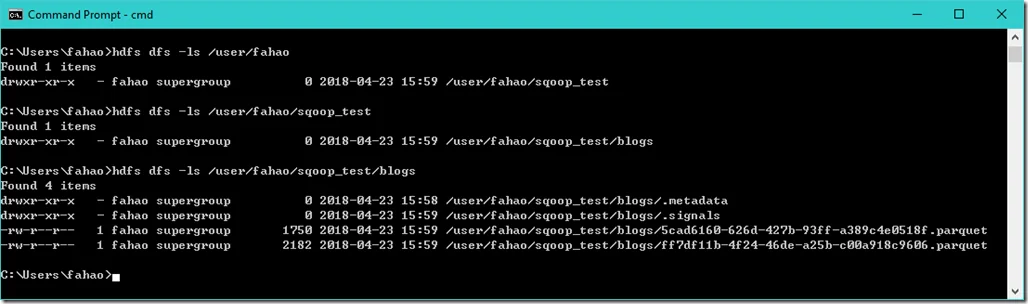
As we can see, the file is imported as Parquet format.
Why there are two files named \*.parquet?
Think about why there are two *.parquet files.
Change the value of parameter --num-mappers in the script file to 3 and then run the script again.
Check again to find out how many *.parquet files have been created.
Change the script file to write output as text file and you will find the results are split into three files.
Verify result in Zeppelin
Use the following code in Zeppelin to read the created parquet file:
%spark import org.apache.spark.{SparkConf, SparkContext} import org.apache.spark.sql.{DataFrame, SQLContext} import spark.implicits._
// Read parquet val sqlContext = new SQLContext(sc) val df=sqlContext.read.parquet("hdfs://0.0.0.0:19000/user/fahao/sqoop_test/blogs") z.show(df)

If you import file as text files, you can use the following code:
%spark import org.apache.spark.{SparkConf, SparkContext} import org.apache.spark.sql.{DataFrame, SQLContext} import spark.implicits._
// Read parquet val sqlContext = new SQLContext(sc) // val df=sqlContext.read.parquet("hdfs://0.0.0.0:19000/user/fahao/sqoop_test/blogs") val df=sqlContext.read.format("csv").load("hdfs://0.0.0.0:19000/user/fahao/sqoop_test/blogs").toDF() z.show(df)
The above code read the input file using format CSV and then convert RDD to data frame.
Summary
It is very convenient to use Sqoop to import data from SQL Server into HDFS and vice versa. You can also use Sqoop to import data as other formats, i.e. plain text file, Avro Data Files and SequenceFiles.
In this particular example, Sqoop generate a Java class in temporary space, which is then used by Map Reduce job (there is no ‘reduce’ required for this scenario).
public class QueryResult extends SqoopRecord implements DBWritable, Writable {
}
The application is then submitted to YARN to execute.
In fact, you can also write your own MapReduce application to implement the same function if you don’t want to use Sqoop.