This detailed step-by-step guide shows you how to install the latest Hadoop v3.3.1 on Windows 10. It leverages Hadoop 3.3.1 winutils tool. WLS (Windows Subsystem for Linux) is not required. This version was released on June 15 2021. It is the second release of Apache Hadoop 3.3 line.
Please follow all the instructions carefully. Once you complete the steps, you will have a shiny pseudo-distributed single node Hadoop to work with.
References
Refer to the following articles if you prefer to install other versions of Hadoop or if you want to configure a multi-node cluster or using WSL.
- Install Hadoop 3.3.0 on Windows 10 Step by Step Guide
- Install Hadoop 3.3.0 on Windows 10 using WSL (Windows Subsystems for Linux is requried)
- Install Hadoop 3.0.0 on Windows (Single Node)
- Configure Hadoop 3.1.0 in a Multi Node Cluster
- Install Hadoop 3.2.0 on Windows 10 using Windows Subsystem for Linux (WSL)
Required tools
Before you start, make sure you have these following tools enabled in Windows 10.
| Tool | Comments |
|---|---|
| PowerShell | We will use this tool to download package. In my system, PowerShell version table is listed below: <br>$PSversionTableName Value<br>---- -----<br>PSVersion 5.1.19041.1237<br>PSEdition Desktop<br>PSCompatibleVersions {1.0, 2.0, 3.0, 4.0...}<br>BuildVersion 10.0.19041.1237<br>CLRVersion 4.0.30319.42000<br>WSManStackVersion 3.0<br>PSRemotingProtocolVersion 2.3<br>SerializationVersion 1.1.0.1<br> |
| Git Bash or 7 Zip | We will use Git Bash or 7 Zip to unzip Hadoop binary package. You can choose to install either tool or any other tool as long as it can unzip *.tar.gz files on Windows. |
| Command Prompt | We will use it to start Hadoop daemons and run some commands as part of the installation process. |
| Java JDK | JDK is required to run Hadoop as the framework is built using Java. In my system, my JDK version is jdk1.8.0_161. Check out the supported JDK version on the following page. https://cwiki.apache.org/confluence/display/HADOOP/Hadoop+Java+Versions From Hadoop 3.3.1, Java 11 runtime is also supported. |
Now we will start the installation process.
Step 1 - Download Hadoop binary package
Select download mirror link
Go to download page of the official website:
Apache Download Mirrors - Hadoop 3.3.1
And then choose one of the mirror link. The page lists the mirrors closest to you based on your location. For me, I am choosing the following mirror link:
https://dlcdn.apache.org/hadoop/common/hadoop-3.3.1/hadoop-3.3.1.tar.gz
info In the following sections, this URL will be used to download the package. Your URL might be different from mine and you can replace the link accordingly.
Download the package
info In this guide, I am installing Hadoop in folder big-data of my F drive (F:\big-data). If you prefer to install on another drive, please remember to change the path accordingly in the following command lines. This directory is also called destination directory in the following sections.
Open PowerShell and then run the following command lines one by one:
$dest_dir="F:\big-data"
$url = "https://dlcdn.apache.org/hadoop/common/hadoop-3.3.1/hadoop-3.3.1.tar.gz"
$client = new-object System.Net.WebClient
$client.DownloadFile($url,$dest_dir+"\hadoop-3.3.1.tar.gz")
It may take a few minutes to download.
Once the download completes, you can verify it:
PS F:\big-data> cd $dest_dir
PS F:\big-data> ls

    Directory: F:\big-data

Mode                 LastWriteTime         Length Name
----                 -------------         ------ ----
-a----        12/10/2021   7:28 PM      605187279 hadoop-3.3.1.tar.gz
You can also directly download the package through your web browser and save it to the destination directory.
warning Please keep this PowerShell window open as we will use some variables in this session in the following steps. If you already closed it, it is okay, just remember to reinitialize the above variables: $client, $dest_dir.
Step 2 - Unpack the package
Now we need to unpack the downloaded package using GUI tool (like 7 Zip) or command line. For me, I will use git bash to unpack it.
Open git bash and change the directory to the destination folder:
cd $dest_dir
And then run the following command to unzip:
tar -xvzf hadoop-3.3.1.tar.gz
The command will take quite a few minutes as there are numerous files included and the latest version introduced many new features.
After the unzip command is completed, a new folder hadoop-3.3.1 is created under the destination folder.
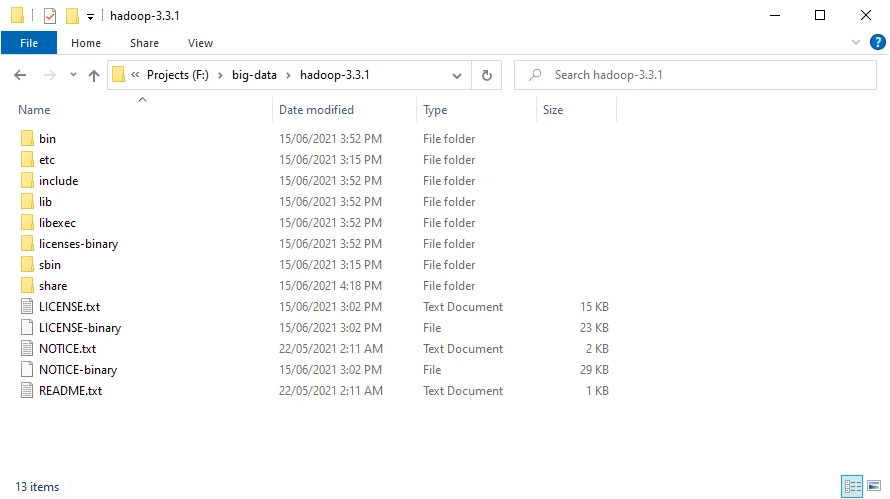
info When running the command you may experience errors like the following:
tar: Exiting with failure status due to previous errors
Please ignore it for now.
Step 3 - Install Hadoop native IO binary
Hadoop on Linux includes optional Native IO support. However Native IO is mandatory on Windows and without it you will not be able to get your installation working. The Windows native IO libraries are not included as part of Apache Hadoop release. Thus we need to build and install it.
infoThe following repository already pre-built Hadoop Windows native libraries: https://github.com/kontext-tech/winutilshttps://github.com/kontext-tech/winutils
warning These libraries are not signed and there is no guarantee that it is 100% safe. We use it purely for test&learn purpose.
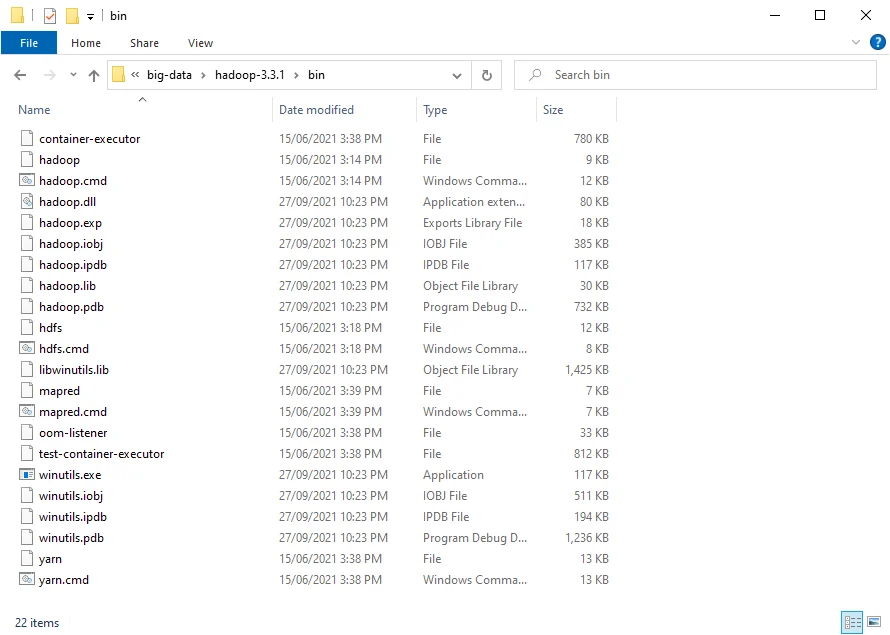
Download all the files in the following location and save them to the bin folder under Hadoop folder. For my environment, the full path is: F:\big-data\hadoop-3.3.1\bin. Remember to change it to your own path accordingly.
https://github.com/kontext-tech/winutils/tree/master/hadoop-3.3.1/bin
After this, the bin folder looks like the following:
Step 4 - (Optional) Java JDK installation
Java JDK is required to run Hadoop. If you have not installed Java JDK, please install it.
You can install JDK 8 from the following page:
https://www.oracle.com/technetwork/java/javase/downloads/jdk8-downloads-2133151.html
Once you complete the installation, please run the following command in PowerShell or Git Bash to verify:
$ java -version
java version "1.8.0_161"
Java(TM) SE Runtime Environment (build 1.8.0_161-b12)
Java HotSpot(TM) 64-Bit Server VM (build 25.161-b12, mixed mode)
If you got error about 'cannot find java command or executable'. Don't worry we will resolve this in the following step.
Step 5 - Configure environment variables
Now we've downloaded and unpacked all the artefacts we need to configure two important environment variables.
Configure JAVA\_HOME environment variable
As mentioned earlier, Hadoop requires Java and we need to configure JAVA_HOME environment variable (though it is not mandatory but I recommend it).
First, we need to find out the location of Java SDK. In my system, the path is: D:\Java\jdk1.8.0_161.
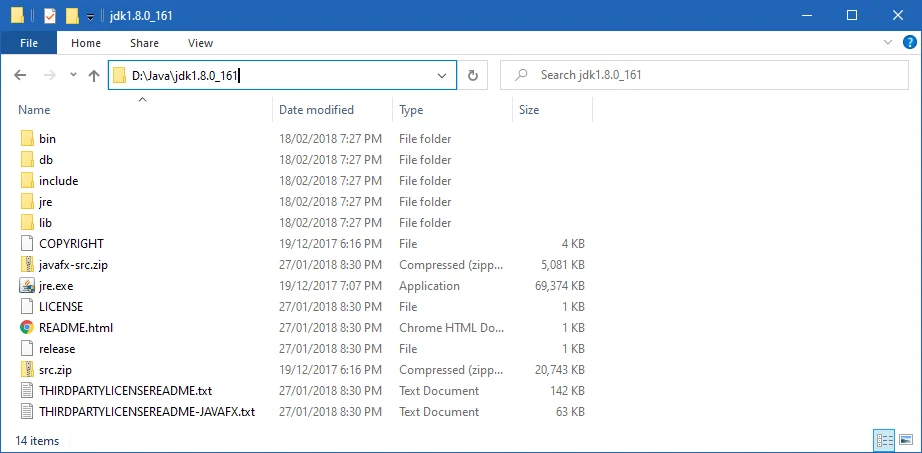
Your location can be different depends on where you install your JDK.
And then run the following command in the previous PowerShell window:
SETX JAVA_HOME "D:\Java\jdk1.8.0_161"
Remember to quote the path especially if you have spaces in your JDK path.
infoYou can setup environment variable at system level by adding option /M however just in case you don't have access to change system variables, you can just set it up at user level.
The output looks like the following:

Configure HADOOP\_HOME environment variable
Similarly we need to create a new environment variable for HADOOP_HOME using the following command. The path should be your extracted Hadoop folder. For my environment it is: F:\big-data\hadoop-3.3.1.
If you used PowerShell to download and if the windowis still open, you can simply run the following command:
SETX HADOOP_HOME $dest_dir+"/hadoop-3.3.1"
Alternatively, you can specify the full path:
SETX HADOOP_HOME "F:\big-data\hadoop-3.3.1"
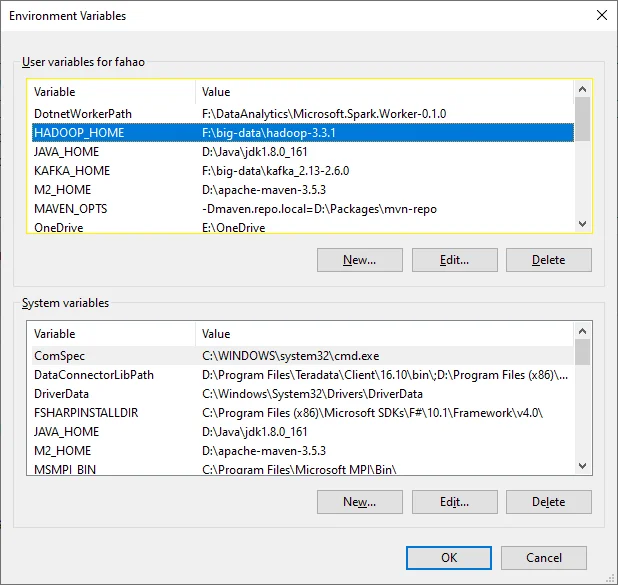
Now you can also verify the two environment variables in the system:
Configure PATH environment variable
Once we finish setting up the above two environment variables, we need to add the bin folders to the PATH environment variable.
If PATH environment exists in your system, you can also manually add the following two paths to it:
- %JAVA_HOME%/bin
- %HADOOP_HOME%/bin
Alternatively, you can run the following command to add them:
setx PATH "$env:PATH;$env:JAVA_HOME/bin;$env:HADOO_HOME/bin"
If you don't have other user variables setup in the system, you can also directly add a Path environment variable that references others to make it short:

Close PowerShell window and open a new one and type winutils.exe directly to verify that our above steps are completed successfully:
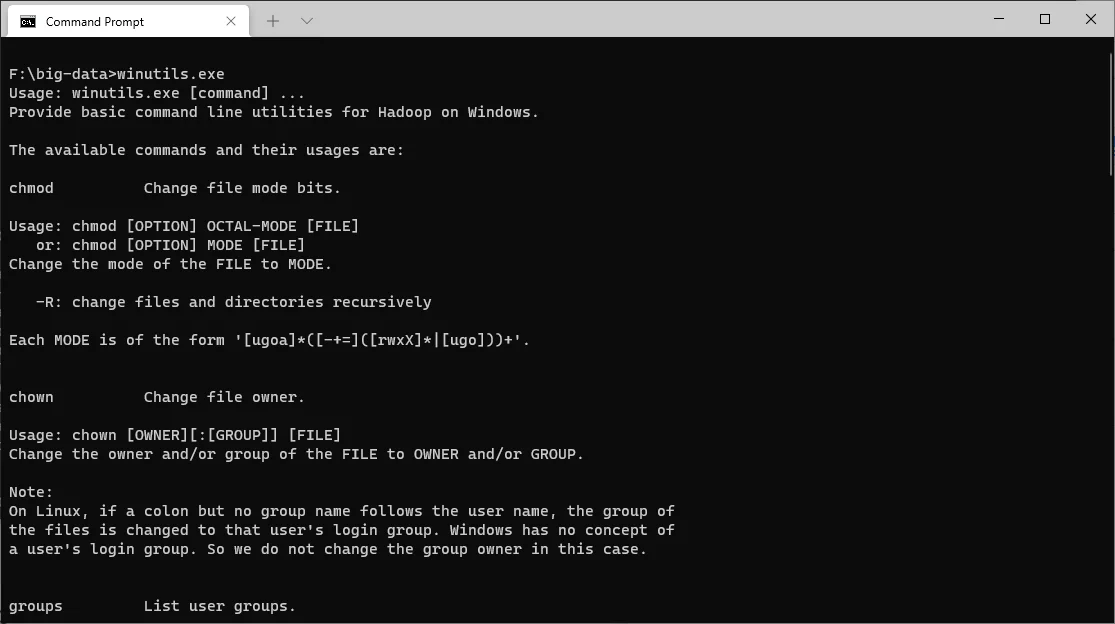
You should also be able to run the following command:
hadoop -version
java version "1.8.0_161"
Java(TM) SE Runtime Environment (build 1.8.0_161-b12)
Java HotSpot(TM) 64-Bit Server VM (build 25.161-b12, mixed mode)
Step 6 - Configure Hadoop
Now we are ready to configure the most important part - Hadoop configurations which involves Core, YARN, MapReduce, HDFS configurations.
Configure core site
Edit file core-site.xml in %HADOOP_HOME%\etc\hadoop folder. For my environment, the actual path is F:\big-data\hadoop-3.3.1\etc\hadoop.
Replace configuration element with the following:
<configuration>   <property>     <name>fs.default.name</name>     <value>hdfs://0.0.0.0:19000</value>   </property>
</configuration>
Configure HDFS
Edit file hdfs-site.xml in %HADOOP_HOME%\etc\hadoop folder.
Before editing, please correct two folders in your system: one for namenode directory and another for data directory. For my system, I created the following two sub folders:
- F:\big-data\data\dfs\namespace_logs_331
- F:\big-data\data\dfs\data_331
Replace configuration element with the following (remember to replace the highlighted paths accordingly):
<configuration>   <property>     <name>dfs.replication</name>     <value>1</value>   </property>   <property>     <name>dfs.namenode.name.dir</name>     <value>file:///F:/big-data/data/dfs/namespace_logs_331</value>   </property>   <property>     <name>dfs.datanode.data.dir</name>     <value>file:///F:/big-data/data/dfs/data_331</value>   </property>
</configuration>
In Hadoop 3, the property names are slightly different from previous version. Refer to the following official documentation to learn more about the configuration properties:
infoFor DFS replication we configure it as one as we are configuring just one single node. By default the value is 3.
infoThe directory configuration are not mandatory and by default it will use Hadoop temporary folder. For our tutorial purpose, I would recommend customize the values.
Configure MapReduce and YARN site
Edit file mapred-site.xml in %HADOOP_HOME%\etc\hadoop folder.
Replace configuration element with the following:
<configuration>
    <property>
        <name>mapreduce.framework.name</name>
        <value>yarn</value>
    </property>
    <property>
        <name>mapreduce.application.classpath</name>
        <value>%HADOOP_HOME%/share/hadoop/mapreduce/*,%HADOOP_HOME%/share/hadoop/mapreduce/lib/*,%HADOOP_HOME%/share/hadoop/common/*,%HADOOP_HOME%/share/hadoop/common/lib/*,%HADOOP_HOME%/share/hadoop/yarn/*,%HADOOP_HOME%/share/hadoop/yarn/lib/*,%HADOOP_HOME%/share/hadoop/hdfs/*,%HADOOP_HOME%/share/hadoop/hdfs/lib/*</value>
    </property>
</configuration>
Edit file yarn-site.xml in %HADOOP_HOME%\etc\hadoop folder.
<configuration>
    <property>
        <name>yarn.nodemanager.aux-services</name>
        <value>mapreduce_shuffle</value>
    </property>
    <property>
        <name>yarn.nodemanager.env-whitelist</name>
        <value>JAVA_HOME,HADOOP_COMMON_HOME,HADOOP_HDFS_HOME,HADOOP_CONF_DIR,CLASSPATH_PREPEND_DISTCACHE,HADOOP_YARN_HOME,HADOOP_MAPRED_HOME</value>
    </property>
</configuration>
Step 7 - Initialize HDFS & bug fix
Run the following command in Command Prompt
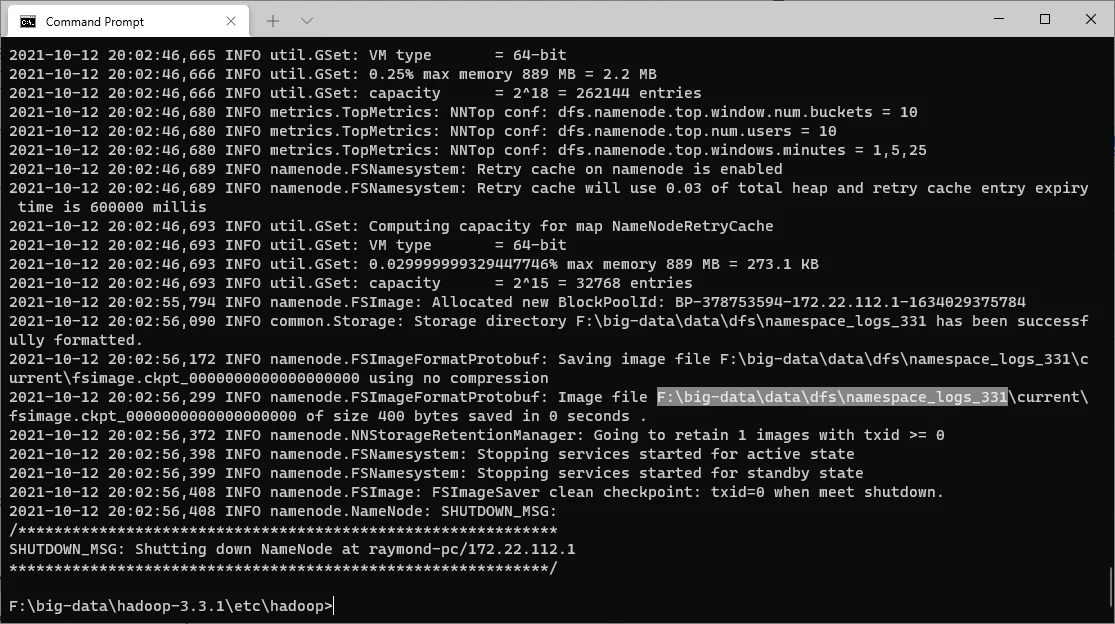
hdfs namenode -format
The following is an example when it is formatted successfully:
Step 8 - Start HDFS daemons
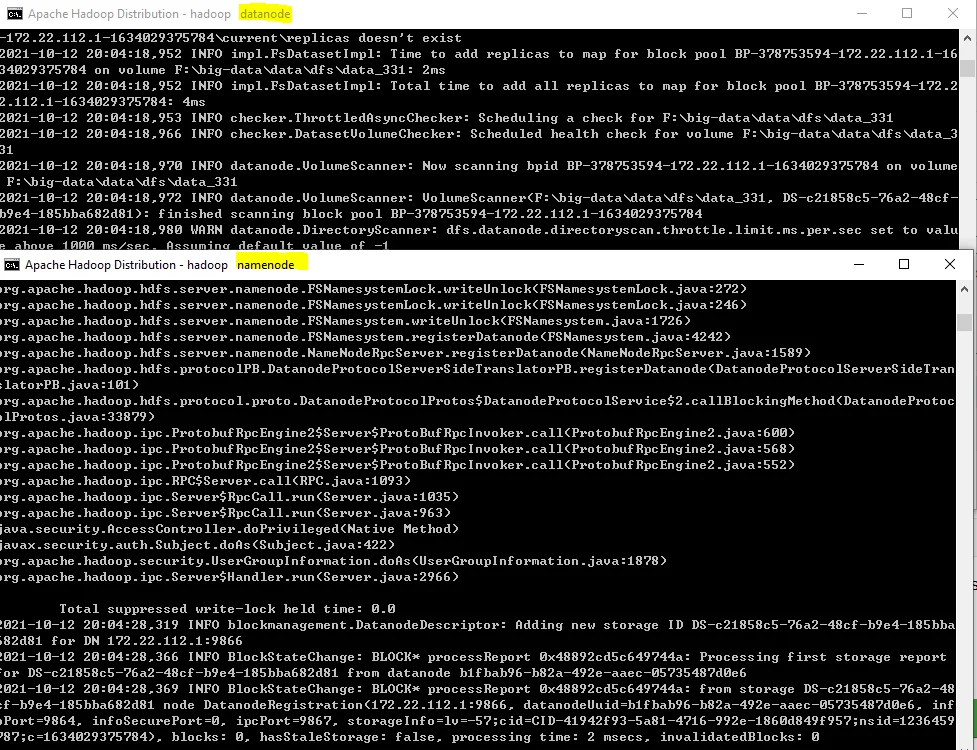
Run the following command to start HDFS daemons in Command Prompt:
%HADOOP_HOME%\sbin\start-dfs.cmdTwo Command Prompt windows will open: one for datanodeand another for namenodeas the following screenshot shows:
You can verify the processes via running the following command:
jps
The results should include the two processes:
F:\big-data>jps15704 DataNode16828 Jps23228 NameNode
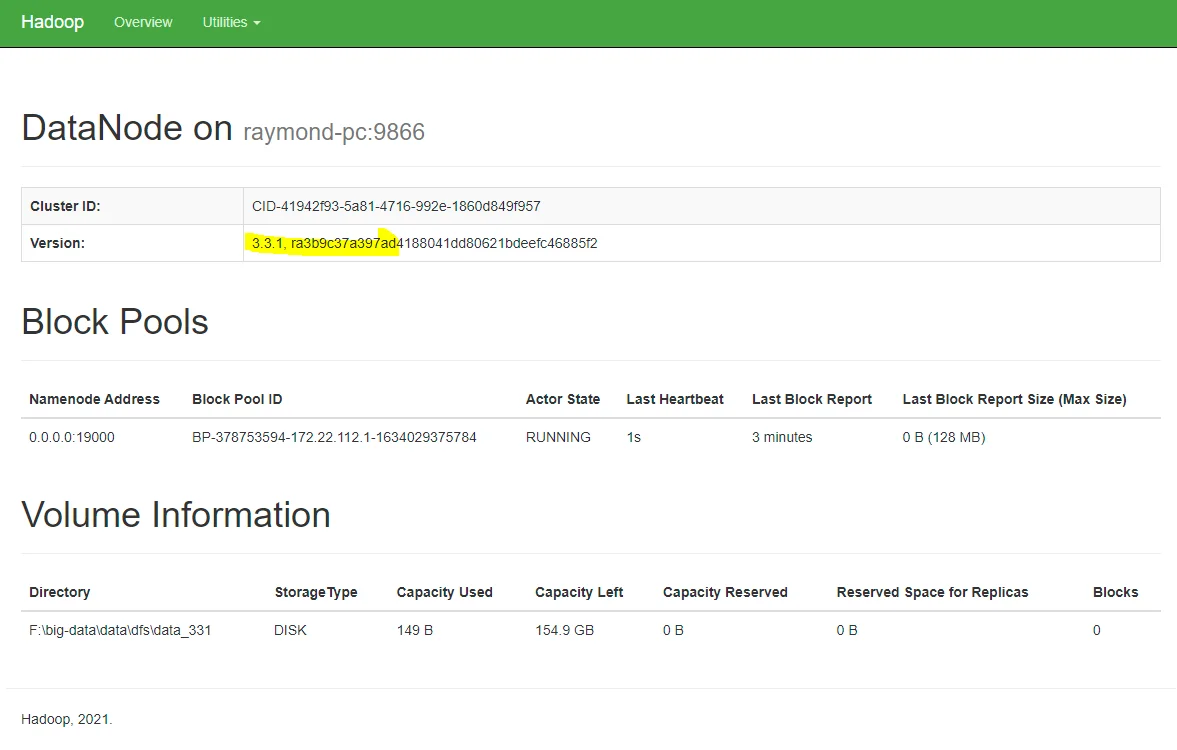
Verify HDFS web portal UI through this link: http://localhost:9870/dfshealth.html#tab-overview.
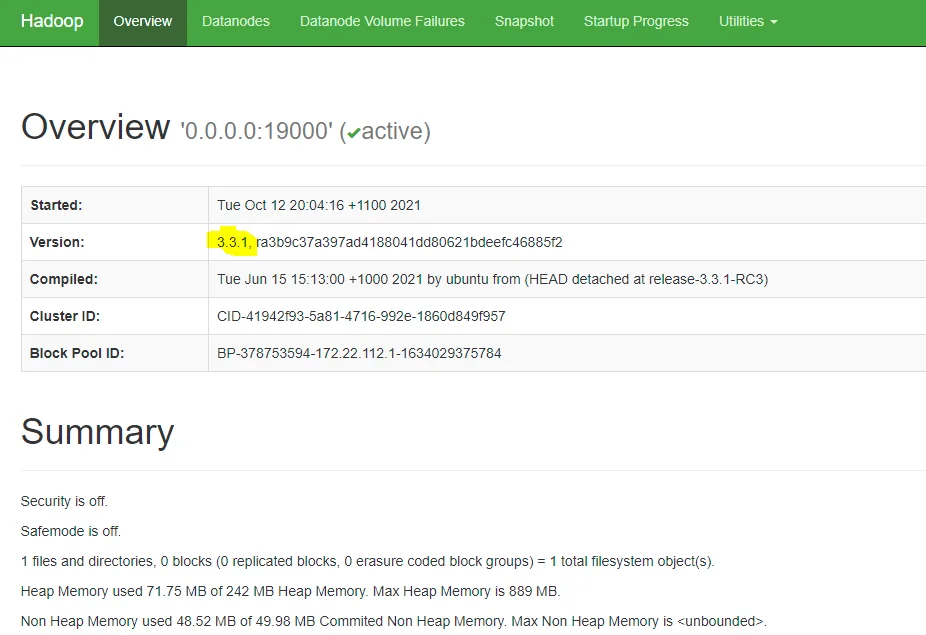
You can also navigate to a data node UI:
Step 9 - Start YARN daemons
warning You may encounter permission issues if you start YARN daemons using normal user. To ensure you don't encounter any issues. Please open a Command Prompt window using Run as administrator. Alternatively, you can follow this comment on this page which doesn't require Administrator permission using a local Windows account: https://app.kontext.tech/comment/314
Run the following command in an elevated Command Prompt window (Run as administrator) to start YARN daemons:
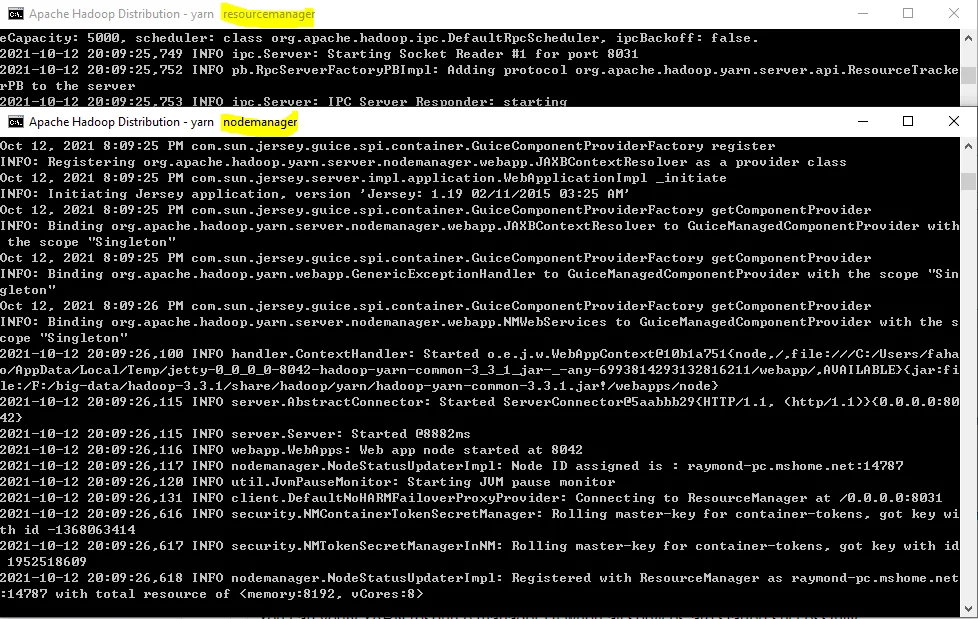
%HADOOP_HOME%\sbin\start-yarn.cmdSimilarly two Command Prompt windows will open - one for resource manager and another for node manager as the following screenshot shows:
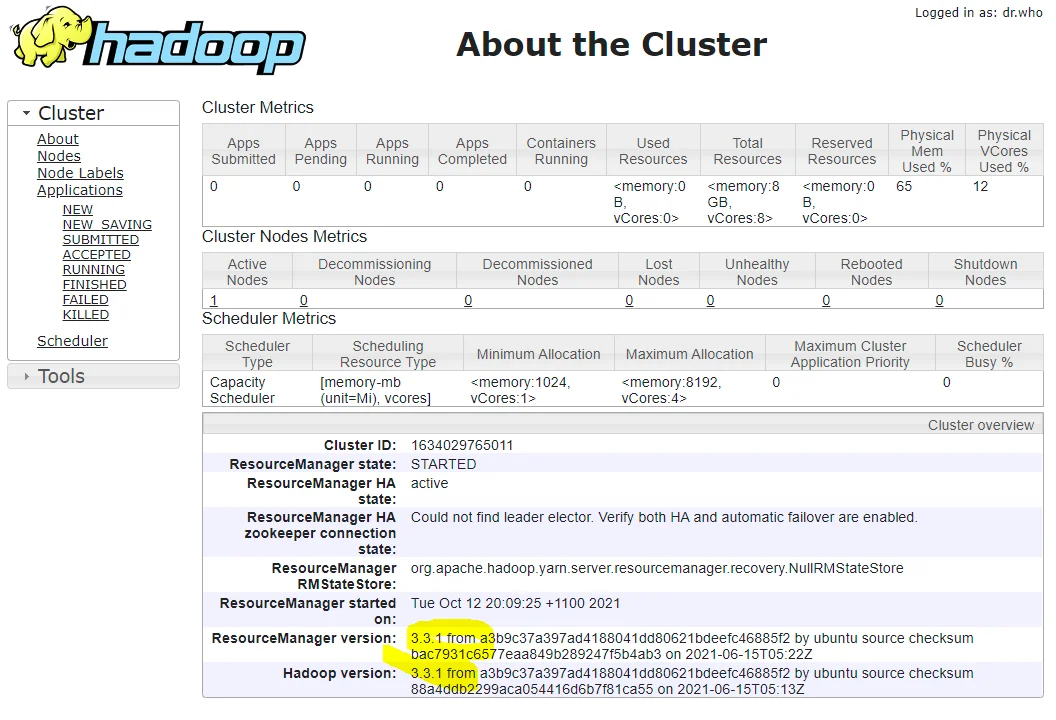
You can verify YARN resource manager UI when all services are started successfully.
Step 10 - Verify Java processes
Run the following command to verify all running processes:
jps
The output looks like the following screenshot:
* We can see the process ID of each Java process for HDFS/YARN.
* Your process IDs can be different from mine.

Step 11 - Shutdown YARN & HDFS daemons
You don't need to keep the services running all the time. You can stop them by running the following commands one by one once you finish the test:
%HADOOP_HOME%\sbin\stop-yarn.cmd
%HADOOP_HOME%\sbin\stop-dfs.cmd
check Congratulations! You've successfully completed the installation of Hadoop 3.3.1 on Windows 10.
Let me know if you encounter any issues. Enjoy with your latest Hadoop on Windows 10.